Showing posts with label Vegan. Show all posts

Sunday, January 31, 2016

Zippy & Refreshing Lime Quinoa Salad - Gluten Free & Healthy


This healthy, vibrant salad is very fresh tasting and delicious. It's an easy keeper in the fridge and is a nice staple to have around for quick meals.

The lime makes the salad bright tasting and the maple syrup tempers the acidity perfectly.

You may serve this with gluten-free corn chips, served over top romaine lettuce or baby spinach, as a lettuce wrap filling, or eat it as-is. It's all good.

You can omit any salt in the recipe so that the salad stores well in your refrigerator a few days without getting watery. Add a touch of salt, to taste, to the portion that is served.

I hope you enjoy this nutritious, easy to make salad as much as we do!


Refreshing Lime Quinoa Salad Recipe:

Salad:

1 c. quinoa
2 c. water
1 can black beans, rinsed well
2 large tomatoes, diced small
4 small scallions, including the green tops, minced (or 2 large)
1/2 c. chopped cilantro leaves

Dressing:

zest of 2 large limes (about 1 heaping T.)
1/4 c. fresh lime juice (about 2 large limes)
1/4 c. extra virgin olive oil (or rice bran oil)
2 T. real maple syrup
1/2 to 1 t. BioSalt or sea salt
1 to 2 t. salt-free seasoning of choice, optional


Method:

Place the quinoa in a large fine mesh strainer. Rinse the quinoa and soak at least 15 minutes in a bowl of water, and rinse again.

Simmer the quinoa and the 2 cups water in a pot, uncovered, for about 10 minutes. Turn off the heat, cover, and let stand on the burner for another 10 minutes.

Strain off any excess water, then let cool as you prepare the rest of the salad.

Combine the dressing ingredients together in a serving bowl, to taste.

Add the cooked quinoa to the salad dressing and toss well.

Add the drained black beans, tomato, scallions, and fresh cilantro and toss well.

Serve warm or chill and serve cold.


NOTE: 

If you plan on storing in the fridge for 2 to 3 days, only add salt at serving time, as you eat it. This prevents the tomatoes from releasing as much juice, eliminating liquid at the bottom of the bowl. If liquid does accumulate, no worries, just stir and serve.


Enjoy,

Leila.

Oriental Style Gluten-Free Quinoa Salad - A Delicious Recipe

Mom's Oriental Style Quinoa Tabouli 


This is another fabulous salad. It is flavorful, gluten-free and packed with healthy deep leafy greens. It is a salad that is hard to get tired of. You can make this ahead of time to enjoy for several meals with a side of clean protein. It's great to take as a lunch for work, or take on picnics, or just to have on-hand when you are in a hurry and need something good for you that's ready to go. The choice of foods we eat when we are in a hurry are frequently the things we regret eating later (I'm not pointing any fingers... soda and candy bar ).

This is a staple in our homes. My dad eats it every day and loves it! My mom and dad make it together and there is always some in their refrigerator. My dad has his black-belt in JUDO and instructs several Judo classes every week. This quinoa salad helps him stay lean and mean. My kids have a grandpa with a 6-pack (and I'm not talking about a 6-pack of root beer). Way to go dad!

There are other delicious variations to this salad that I will post later.


ORIENTAL  STYLE  QUINOA  TABOULI  Recipe:

Serves 4 to 6

2 c. cooked quinoa (or cooked sprouted quinoa), cooled
1/4 c. rice vinegar, to taste
1/4 c.raw sesame oil
1/4 c. rice oil
2 t. toasted sesame seed oil, to taste
A pinch of. ascorbic acid powder (vitamin C)
2 large scallions, thinly sliced
2 T. grated fresh ginger root, to taste
2 T. toasted sesame seeds
1 large bunch flat-leaf Italian parsley, without coarse stems
2 peeled and grated organic carrots
1/2 bunch dark kale, collard or broccoli leaves, chopped fine (use half as much kale as parsley)
2 medium cucumbers, peeled, large seeds removed, and cubed small (about 1/4th-inch squares)


Garnish when serving only because it contains salt:

Tamari soy sauce (gluten-free)


Method:

Mix all ingredients together thoroughly, adding ginger, rice vinegar and toasted sesame oil to taste.
Pack in air-tight containers in the refrigerator.
This keeps well several days because no salt has been added yet.
To serve, season individual portions with Tamari, to taste.

Remember, DO NOT ADD SALT if you plan on storing any length of time


Plain Quinoa


Note:

Adding salt or any ingredients containing salt to the quinoa salad makes the juices leach out and get watery and yucky. You will not be able to store it in the refrigerator either.

That includes cheeses, soy sauce, Bragg's Aminos, etc...

Add salt and your salty ingredients only when eating it - because it does need salt!

Ascorbic acid powder added to all of your quinoa Tabouli salads has the big benefits of increasing the salad's shelf-life, keeping it fresh flavored longer. It also keeps the greens crisp and green


Enjoy!

Leila.

Amazing Quinoa Tabouli - Make ahead for quick meals

Mom's Quinoa Tabouli

This is a fabulous salad. It is flavorful, gluten-free and packed with healthy deep leafy greens. It is a salad that is hard to get tired of. You can make this ahead of time to enjoy for several meals with a side of clean protein. It's great to take as a lunch for work, or take on picnics, or just to have on-hand when you are in a hurry and need something good for you that's ready to go. The choice of foods we eat when we are in a hurry are frequently the things we regret eating later (I'm not pointing any fingers... soda and candy bar ).

This is a staple in our homes. My dad eats it every day and loves it! My mom and dad make it together and there is always some in their refrigerator. My dad has his black-belt in JUDO and instructs several Judo classes every week. This quinoa salad helps him stay lean and mean. My kids have a grandpa with a 6-pack (and I'm not talking about a 6-pack of root beer). Way to go dad!

There are delicious variations to this salad that I will post later. Note: These have now been posted:

See our Oriental-Style Quinoa Tabouli recipe.
See our Itallian-Style Quinoa Tabouli recipe.
See our Mexican-Style Quinoa Tabouli recipe.


Try this Tabouli recipe with this amazing Chicken Bake recipe HERE.


QUINOA TABOULI Recipe:

Serves 4 to 6

2 c. cooked quinoa (or cooked sprouted quinoa), cooled
1/4 c. fresh lemon juice, to taste
1/2 c. olive oil (or Green Oil recipe on this blog)
A pinch of. ascorbic acid powder (vitamin C)
1 garlic clove, pressed through a garlic press
2 large scallions, thinly sliced
2 T. dried dill weed (or fresh dill weed to taste)
2 T. dried mint leaves, crumbled (or fresh mint to taste)
1 large bunch flat-leaf Italian parsley, without coarse stems
1/2 bunch dark kale, collard or broccoli leaves, chopped fine (use half as much kale as parsley)
2 medium cucumbers, peeled, large seeds removed, and cubed small (about 1/4th-inch squares)


Garnish:

3 medium tomatoes, diced small
BioSalt (recipe on this blog)


Method:

Mix all listed ingredients together thoroughly, adding lemon juice to taste.
Pack in air-tight containers in the refrigerator.
This keeps well several days because no salt has been added yet.
To serve, salt only your individual serving, to taste.
Garnish with fresh chopped tomatoes and serve.

Remember, DO NOT ADD SALT if you plan on storing any length of time


Tips:

If dried herbs are used, the flavor may be a little flat tasting. You can amp up the flavor by adding some dried oregano plus dried basil, to taste. Or add dried oregano plus a touch of dried tarragon (tarragon is a potent herb, so a little goes a long way).

You may also grind dill seeds in a seed mill and add a touch of the powder to your quinoa.

You may also use essential oils of dill seed and/or spearmint. Do not overdo it! Touch a clean finger to the essential oil dispenser so that you have less than a drop. Rub the oil off of your finger and onto the inside bottom of your mixing bowl before the other ingredients are added. Add the salad oil and mix well, to dilute it. You don't want an essential oil hot spot in your salad! Add the rest of the ingredients and toss well.


Note:

Ascorbic acid powder added to all of your quinoa Tabouli salads has the big benefits of increasing the salad's shelf-life, keeping it fresh flavored longer. It also keeps the greens crisp and green

Adding salt or any ingredients containing salt to the quinoa salad makes the juices leach out and get watery and yucky. You will not be able to store it in the refrigerator either.

That includes cheeses, soy sauce, Bragg's Aminos, etc...

Add salt and your salty ingredients only when eating it - because it does need salt!


Enjoy!

Leila and Nancy

Monday, November 30, 2015

Dark Chocolate Cherry Almond Clusters - Costco Copy-Cat - Make your own and save some money!

Dark Chocolate Almond Cherry Clusters

We bought these at Costco and loved them. They are very easy to make yourself. I like portioning them out with a mini cookie scoop, they look professionally made that way.

I think these are best with tart dried cherries, otherwise known as pie cherries. I find lightly sweetened dried tart cherries at Costco. Costco usually has the roasted whole almonds too.

I love using Lakanto's new sugar-free dark chocolate, which was formulated by my amazing mom. It really is the best, plus it's healthy!

Enjoy the benefits of the antioxidants and protein packed in these little babies.


Almond Cherry Clusters Recipe:

16 ounces sugar-free dark chocolate (like a 72%)
8 to 10 ounces dry-roasted whole almonds (salted is o.k.)
8 to 10 ounces dried TART cherries


Method:

Melt and temper the chocolate.
Stir in the almonds and cherries.
Drop by Tablespoonfuls onto parchment or silicone lined cookie sheets.
Cool in the fridge, in front of a fan, or outside if its cool.
Store airtight once set up.

Makes 2 cookie sheetfuls.


Note: To save money, alter the ratio of almonds to the cherries, to cut costs.
ie. 16-oz chocolate, 12-oz almonds, 8-oz cherries, works well.


Enjoy!

Leila.

Broccoli Stem Salad - A delicious unique salad recipe - Easy to make and very good for you

Flaked Broccoli Stem Salad

Finally a great use for those broccoli stems you don't know what to do with. When you are preparing broccoli, reserve the stems for this salad. It's yummy.

I had this salad at my parents house in 2005. It's another of my mom's creations. It is very high in fiber and makes a great lunch or side. The texture is great, and there is an array of complimentary flavors, like sweet, tangy, savory... YUM.

Look on this blog for the recipe for Dad's Dressing. It is very easy to make and is preferred for this salad.


FLAKED BROCCOLI STEM SALAD RECIPE:

1 pound raw broccoli stems, peeled and flaked into 1 1/2-inch lengths (can use a sharp vegie peeler)
1/2 to 2/3 c. cubed roma tomatoes, or 2 to 4 T. flavored sun-dried tomatoes, chopped
Pitted black olives, to taste

Dad's Dressing, to taste

Garnish: Pine nuts, "Crispy Walnuts", or Spicy Seasoned Pepitas (pumpkin seeds)


Method:

Mix up the salad to taste, toss with "Dad's dressing", and garnish as desired.
Serve immediately.


Note:

See the recipe for "Crispy Soaked Almonds", to see how to make in advance the Crispy walnuts. the process is the same. Our method makes walnuts have a much better taste and texture!


Enjoy,

Leila


Tuesday, November 17, 2015

Red & Green Italian Salad - A delicious hearty Italian salad with an easy homemade dressing

Red & Green Italian Salad

This is a hearty beautiful salad and can make a meal by itself. It is something different to take on a picnic or pot-luck.

This is an easy recipe to adjust for specific diets like paleo, low-carb, vegan, gluten-free, or dairy-free. Use gluten-free pasta or omit the pasta altogether if you want to. Omit the cheese if you avoid dairy.


RED & GREEN ITALIAN SALAD Recipe:

Salad Ingredients:

1 can jumbo pitted black olives
2 c. cooked gluten-free large shell macaroni, or other shape if desired
1 4-ounce jar pimentos with juice, sliced into strips
4 to 5 small zucchini, sliced thick
1 quart lightly steamed broccoli, cut into uniform bite-sized pieces
1 quart lightly steamed cauliflower, cut into uniform bite-sized pieces
1 medium red onion, sliced in rings
1 to 2 dozen small mushrooms, stemmed and sliced in half

Dressing ingredients:

1/2 c. good olive oil, or more
1/2 c. red wine vinegar
1 to 2 garlic cloves, well smashed
1/2 to 1 t. sweet paprika
1 t. fennel seed (soaked in water to soften, then drained)
1 t. dried oregano
BioSalt, to taste (recipe on this blog)
Fresh ground pepper, to taste
Mozzarella or Jack cheese, cubed, optional

Garnish:

Freshly grated Parmesan cheese, optional


Method:

In a large bowl, toss the salad ingredients together.

In a separate mixing bowl, combine the salad dressing ingredients together. Season it well.

Pour the well-mixed dressing over the salad ingredients and toss together thoroughly.

Marinate 1 hour.

Serve garnished with Parmesan cheese, if desired.


Note: You can serve this salad on a bed of lettuce.


Enjoy,

Leila

Sunday, November 8, 2015

Tiger Bites - A healthy raw coconut-apricot sugar-free candy

Tiger Bites - A Sugar-free Candy


I love these cute little confections.  My mom made a similar version of these but I didn't have her recipe, so I recreated this version of them. They are a perfect combination of sweet and tangy. The fresh citrus brightens the flavor and they have a delightful chewy texture. Best of all, they have no added sugar!

There are sorta-similar recipes out there using sweetened condensed milk and powdered sugar. They are flat tasting compared to these.

You can feel good about serving this great tasting, sugar-free and dairy-free version to your family!


TIGER BITES recipe:

1 1/2 c. (12 ounces) dried unsulphured organic California apricots
3 T. (1.5 ounces) Juice of 1/2 organic orange
Zest of 1/2 organic orange (0.50 ounces)
3 T. (1.5 ounces) fresh lime or lemon juice
1 T. (0.50 ounces) xylitol (or Lakanto zero-cal white granular sweetener)
1/4 t. BioSalt (recipe on this blog)
2 c. (4 ounces) dried unsweetened coconut chips
1 1/2 c. (3 ounces) unsweetened dried coconut, finely ground, for rolling


Method:

Snip the whole dried apricots into quarters and place in a bowl of a food processor.

Pour the orange juice, grated orange zest, lime or lemon juice, xylitol, and salt over the apricots.

Let the apricots soak while you prepare everything else, or about 5 minutes.

Place the finely ground coconut in a shallow bowl and set aside.

Place the BioSalt and half of the coconut chips into the food processor with the apricots.

Blend until the mixture until it starts to look chopped.

Add the rest of the coconut chips and process until it clumps into a mass.

Taste for sweetness and tartness. adjust if necessary.

Use a stainless steel 18/8-size ice cream/portion scoop to portion out half-ounce balls.

Drop the balls in the bowl of finely ground coconut and roll to completely cover the confection.

Seal air-tight and store in the refrigerator.


Note: I drop 4 or so balls at a time into the bowl of finely ground coconut, and then shake and roll  them about until well coated.


Enjoy the sweetness of life!


Leila.

Herb Flax Crackers - The 7th in a series of excellent Raw Food recipes

Herb Flax Crackers


I am posting a series of RAW FOOD RECIPES created by my mother Nancy Glazier and her good friend Irene Hauver. 

Together, as raw food pioneers, they complied an amazing collection of unique recipes that they used in teaching a series of raw-food-living un-cooking classes. We have a selection of delicious raw food recipes big enough to fill an entire cookbook. I know, cool, right?

These recipes are amazingly tasty! This is doing raw food right. Most raw food recipes are seriously lacking in taste and texture - well, not this collection. These beautiful ladies don't do anything half way! We are excited for you to try them.


Herb Flax Crackers are very handy to have in your pantry for when you need a speedy lunch or get the munchies. They have a delightful crunch and are SO healthy for you! Spread with Sunnie Sour Cream (recipe on this blog), Sunny Hummus (recipe on this blog), or other spread of choice.


HERB FLAX CRACKERS Recipe:

Ingredients:

4 cups Flax seeds, soaked in 8 cups water 8 hours (do not drain)
1/2 Onion, quartered
5 cloves Garlic
2 cups Chopped fresh herbs (chives, dill, sage, basil, oregano, parsley, kale, spinach, etc.)
2 t. Sea salt
1/4 cup Fresh lemon juice


Equipment:

Blender (like a VitaMix)
Food dehydrator with Teflex sheets for drying the crackers on
Bowl and spoon


Directions:

Combine onions, garlic, fresh herbs, salt, and lemon juice in blender. Puree until smooth. place in bowl.

Add 2 cups of soaked flax seeds and 1 1/2 cups water to blender. Puree until smooth. Pour into bowl with herb mixture.

Repeat with 2 more cups of soaked flax seeds.

Pour remaining whole soaked flax seeds into bowl with herb mixture and sir well to combine flavors.

Spread 2 cups of batter 3/8-inch thick on approx 8 Teflex Food dehydrator sheets.

Dry in a food dehydrator at 110 degrees for 8 hours. Flip onto screen.

Dry 12 more hours until crisp. Break into large cracker-sized pieces.

Store crackers in a pantry away from sunlight, in air-tight bags or bins. Fills an 8-quart size Zip-lock bag.

These crackers keep and store well.


Tips: 

The idea is to add just enough water to the soaked flax seeds in the blender to make a rough puree. This makes for crisper, thinner chips instead of just chewing on flax seeds stuck together. Use enough water to make it blendable in your blender.

Do not add an excess of water to soak the flax seeds - add just enough to make the mass like a thick batter. Then you can add water if needed during the pureeing process in your VitaMix blender. it's not like when we soak nuts in lots of water.

My mom always adds a bit of Vitamin C powder to her chips. It keeps her chips fresher tasting for longer, plus it keeps the colors lighter and brighter. Start with adding from 1/4 to 1/2 t. Vitamin C.


Note: Do not add more than the 2 t. sea salt asked for in this recipe. All dehydrated chips and crackers taste saltier once dried, because they are condensed, concentrating the salt.


Recipe created by the Kitchen Cheetahs, Nancy Glazier & Irene Hauver.


Enjoy!

Author, Leila Wood.

Neat Loaf - Seriously delicious! - The 6th in a series of excellent raw food recipes

Neat Loaf

I am posting a series of RAW FOOD RECIPES created by my mother Nancy Glazier and her good friend Irene Hauver. 

Together, as raw food pioneers, they complied an amazing collection of unique recipes that they used in teaching a series of raw-food-living un-cooking classes. We have a selection of delicious raw food recipes big enough to fill an entire cookbook. I know, cool, right?

These recipes are amazingly tasty! This is doing raw food right. Most raw food recipes are seriously lacking in taste and texture - well, not this collection. These beautiful ladies don't do anything half way! We are excited for you to try them.


Neat Loaf is a delicious, vegan, Raw Food version of Meatloaf. No, I mean it, It's delicious. Remember the Kitchen Cheetah's rule: if it's yucky - it's banned!

This recipe has been time-tested. My mom says that it makes a terrific vegan taco meat - Just crumble it and season with Mexican seasoning, then dehydrate it in a food dehydrator, until it is a "meaty" texture.

Make a big batch of this 'Neatloaf" and store in your freezer for quick meals later. It is a great food for cleansing diets, vegan, vegetarian, etc... Check all your ingredients if you are on a gluten-free diet.


RAW NEAT LOAF Recipe:

Ingredients:

1/2 c. Raw pecan (or filbert) butter

3/4 c. Wild rice (or rye), soaked and rinsed 2 days minimum (up to 4 days if kept cool), chopped. (Rice is very tough, it must be soaked and chopped into pieces before grinding with a CHAMPION Juicer.)

1/4 c. Lentils, soaked and sprouted 2 days and chopped

1/4 c. Sunflower seeds, soaked in water with a pinch of Vitamin C added, for 6 hours, then chopped

1/4 c. Dried tomatoes, soaked in 1 cup water till soft, and then chopped

1/2 c. Walnuts, soaked 8 hours and rinsed, and then chopped

1 c. Minced zucchini, partly dried in a food dehydrator, until "leathery"

2 T. Olive oil

1/2 c. Minced carrot

1/2 c. Minced celery

1/2 c. Minced parsley

1/2 c. "Sauteed Mushrooms and Onions"

1/2 c. Minced fresh basil

2 Green onions, minced

2 large Garlic cloves mashed with 1/2 t. sea salt

2 T. Tahini

2 T. Shoyu

2 T. Nutritional yeast flakes

2 T. Ground flax seeds

2 T. Walnut oil (or olive oil)

2 t. Sweet paprika

1 T. Miso

1 t. Fresh minced rosemary (optional)

1/4 t. Ground white pepper

1/2 to 1 t. Sea salt (to taste)

2 t. Guar gum (if making veggie burgers)


Equipment:

Champion Juicer
Knife and chopping block or food processor
Large bowl and spoon
Food dehydrator


Directions:

Mix pecan butter and chopped wild rice together.

Process through a CHAMPION JUICER until creamy.

Place the rest of the ingredients in a bowl with the rice and pecan butter. Stir well.

Taste for flavor. Adjust if necessary.

shape into 10, 1/2-cup loaves on food dehydrator screens. Dry at 110 degrees about 6 hours.

Serve warm with olive oil, ketchup, or BBQ sauce drizzled on top.

Makes approximately 10 loaves. Freezes and reheats well.


Helpful hint: Make the "Neatloaf" one day, chill. Form the loaves and dry them the next day.


Recipe created by the Kitchen Cheetahs, Nancy Glazier & Irene Hauver.


Enjoy!

Author, Leila Wood.

Creamy Tahini Dressing - The 5th in a series of excellent Raw Food recipes

Tahini Dressing

I am posting a series of RAW FOOD RECIPES created by my mother Nancy Glazier and her good friend Irene Hauver. 

Together, as raw food pioneers, they complied an amazing collection of unique recipes that they used in teaching a series of raw-food-living un-cooking classes. We have a selection of delicious raw food recipes big enough to fill an entire cookbook. I know, cool, right?

These recipes are amazingly tasty! This is doing raw food right. Most raw food recipes are seriously lacking in taste and texture - well, not this collection. These beautiful ladies don't do anything half way! We are excited for you to try them.


Raw Tahini Dressing is a creamy basic dressing that is easy to make. This tasty dressing is vegan, nut-free, sugar-free, and gluten-free, as well as being perfect for raw food diets. This is one of my mom's favorite dressings.


RAW TAHINI DRESSING Recipe:

Yield: Makes 2 cups

Ingredients:

1 c. Purified water
1 c. Tahini (or raw unsalted sesame seeds)
1/2 t. Garlic powder
1 T. Fresh lemon juice (1/2 lemon)
3/4 t. Sea salt
1/4 c. Parsley (fresh is best but dry will do)


Equipment:

Blender


Directions:

Place all the ingredients, except the parsley, into the blender. Process until smooth.

Taste for flavor. Adjust if necessary.

Pulse in the parsley.

Use immediately or chill for future use.

This dressing may thicken upon standing. To thin just stir in a little water. It should be pourable.

This is great over salads, as a creme base for soups, as a veggie dip, or spread on crackers.


Recipe created by the Kitchen Cheetahs, Nancy Glazier & Irene Hauver.


Enjoy!

Author, Leila wood.

Classic Vinaigrette Dressing - The 4th in a series of excellent raw food recpes

Dad's Classic Dressing

I am posting a series of RAW FOOD RECIPES created by my mother Nancy Glazier and her good friend Irene Hauver. 

Together, as raw food pioneers, they complied an amazing collection of unique recipes that they used in teaching a series of raw-food-living un-cooking classes. We have a selection of delicious raw food recipes big enough to fill an entire cookbook. I know, cool, right?

These recipes are amazingly tasty! This is doing raw food right. Most raw food recipes are seriously lacking in taste and texture - well, not this collection. These beautiful ladies don't do anything half way! We are excited for you to try them.

Dad's Classic Dressing is a basic to always have on hand. This all-purpose dressing goes with just about everything, and also works great as a marinade. If you are on a raw food diet, you are probably having at least 1 salad a day, so you will go through it quickly.


DAD'S CLASSIC VINAIGRETTE DRESSING Recipe:

Yield: Makes 1 pint

Ingredients:

1 1/2 c. Olive oil
3 Cloves garlic
2 T. Fresh lemon juice
1/2 t. Sea salt
1 t. Dried oregano
1 t. Dried basil


Equipment:

Blender


Directions:

Place all ingredients in blender. Blend until smooth.

Keep in the refrigerator. It will keep for 2 weeks.


A weeks supply of Dad's Classic Dressing:

Yield : Makes 2 quarts

6 c. Olive oil
12 Cloves garlic
1/2 c. Fresh lemon juice
3 t. Sea salt
4 t. Dried oregano
4 t. Dried basil


Directions:

Proceed the same as above.


Recipe created by the Kitchen Cheetahs, Nancy Glazier & Irene Hauver.


Enjoy!

Leila.

Poppy Seed Dressing - the 3rd in a series of excellent Raw Food recipes

Raw Poppy Seed Dressing

I am posting a series of RAW FOOD RECIPES created by my mother Nancy Glazier and her good friend Irene Hauver. 

Together, as raw food pioneers, they complied an amazing collection of unique recipes that they used in teaching a series of raw-food-living un-cooking classes. We have a selection of delicious raw food recipes big enough to fill an entire cookbook. I know, cool, right?

These recipes are amazingly tasty! This is doing raw food right. Most raw food recipes are seriously lacking in taste and texture - well, not this collection. These beautiful ladies don't do anything half way! We are excited for you to try them.

This Poppy Seed Dressing is a favorite at the Hauver household. You can vary the flavor by using different fruits - So have fun with it!


POPPY SEED DRESSING Recipe:

Yield: Makes 1 1/2 cups.

Ingredients:

1/4 c. Fresh lemon juice (or juice from 1 lemon)
1/2 c. Strawberries, fresh or frozen (about 8 strawberries, or 12 raspberries, 1 apple, or jam to taste)
3/4 c. Olive oil
16  Honey dates, soaked and pitted (or 6 T. Sucanat) (or 1/2 c. date sugar)
2 T. Raw onion (up to 1/4 c. fresh onion)
1 t. Sea salt
1/2 t. Dry mustard
1/4 t. Beet powder (optional for color)
1/4 c. Purified water (to thin as needed)
2 t. Poppy seeds


Equipment:

Blender


Directions:

Place all of the ingredients, except the poppy seeds, into the blender. Blend until smooth. thin as necessary to get a pourable dressing. Taste for flavor. Adjust if necessary.

Stir in the poppy seeds. Chill until ready to use.

Keeps 1 week in the refrigerator.

This dressing is great over spinach salad.


Five times the recipe to make 7 1/2 cups:

1 1/4 c. Fresh lemon juice
2 1/2 c. Strawberries
3 3/4 c. Olive oil
80 Honey dates, soaked and pitted
10 T. Raw onion
5 t. Sea salt
2 1/2 t. Dry mustard
1 1/4 t. Beet powder (optional for color)
1 1/4 c. Water (to thin as needed)
10 t. Poppy seeds


Recipe created by the Kitchen Cheetahs, Nancy Glazier & Irene Hauver.


Enjoy!

Leila

Sunny Sour Cream (using soaked sunflower seeds) - The 2nd in a series of excellent Raw Food recipes

Sunny Sour Cream

I am posting a series of RAW FOOD RECIPES created by my mother Nancy Glazier and her good friend Irene Hauver. 

Together, as raw food pioneers, they complied an amazing collection of unique recipes that they used in teaching a series of raw-food-living un-cooking classes. We have a selection of delicious raw food recipes big enough to fill an entire cookbook. I know, cool, right?

These recipes are amazingly tasty! This is doing raw food right. Most raw food recipes are seriously lacking in taste and texture - well, not this collection. These beautiful ladies don't do anything half way! We are excited for you to try them.


SUNNY SOUR CREAM Recipe:

Ingredients:

1 c. sunflower seeds, soaked 2 hours in 2 cups water, drain
3/4 c. water
1/2 t. sea salt or BioSalt
2 to 3 T. fresh lemon juice
1/4 t. garlic powder
1/2 t. onion powder
1/2 t. dill weed


Equipment:

Blender


Directions:

Place all the ingredients into the blender and blend until smooth. Adjust water and seasonings to taste and consistency desired.


Mom's Tip: This makes an awesome topping and dip base to flavor to taste.


Recipe created by the Kitchen Cheetahs, Nancy Glazier & Irene Hauver.


Enjoy!

Leila

Almond Sour Cream - The 1st in a series of excellent Raw Food recipes

Raw Almond Sour Cream

I am posting a series of RAW FOOD RECIPES created by my mother Nancy Glazier and her good friend Irene Hauver. 

Together, as raw food pioneers, they complied an amazing collection of unique recipes that they used in teaching a series of raw-food-living un-cooking classes. We have a selection of delicious raw food recipes big enough to fill an entire cookbook. I know, cool, right?

These recipes are amazingly tasty! This is doing raw food right. Most raw food recipes are seriously lacking in taste and texture - well, not this collection. These beautiful ladies don't do anything half way! We are excited for you to try them.


BEST ALMOND SOUR CREAM Recipe:

Ingredients:

Yield: 5 cups

1 cup raw almonds, soaked 8 hours and drained
2 c. Purified water
1 c. Olive oil
1 1/2 t. Onion powder
1 t. Sea salt
1/4 t. Vitamin C powder (ascorbic acid), optional
1/4 t. Garlic powder
1/4 c. fresh lemon juice (or juice from 1 lemon)


Equipment:

Blender


Directions:

Place all the ingredients into the blender. Process until smooth and creamy. Taste for flavor. Adjust if necessary.

Use immediately or chill for future use. This dressing may thicken upon standing. To thin just stir in a little water. My mom prefers this Almond Sour Cream thick, Irene prefers It pourable.

This is great over salads, as a cream base for soups, as a substitute for mayonnaise, and to spread on crackers topped with an avocado.


Double this recipe to make 10 cups:

2 c. Almonds, soaked
3 c. Purified water
3 c. Olive oil
3 t. Onion powder
2 t. Sea salt
1/2 t. Vitamin c powder
1/2 t. Garlic powder
1/2 c. Fresh lemon juice


Note: This is my mom's favorite raw sour cream ...And she loves sour cream!


Recipe created by the Kitchen Cheetahs, Nancy Glazier & Irene Hauver.


Enjoy!

Leila

Tuesday, November 3, 2015

A zippy 3-bean salad recipe (Sugar-free with no artificial sweeteners)

Sugar-Free Three Bean Salad

Sugar-Free Three Bean Salad
This has been a favorite salad of mine since I was a child. My aunt made this salad using regular granulated white sugar. It is really good but I wanted to create a version that does not use sugar. I also use a fresh, healthy oil instead of canola, soy, peanut, or corn oil.

Making this salad yourself is really easy, and now you can control the sugar content.  It never is as good in restaurants as when homemade anyway, have you noticed that?

I like to make and have on hand a sugar-free sweetener blend of 50% erythritol and 50% xylitol, which is conveniently used here. Just store in your pantry for quick access.

NOTE: The 3/4 c. sweetener called for is replacing 3/4 cup of granulated white sugar normally called for in this recipe.


Sugar-Free Three Bean Salad Recipe:

1 pint (1 lb) canned green beans
1 pint (1 lb) canned wax beans
1 1/2 c. freshly cooked dried red kidney beans (or 1 can drained and rinsed)
1/2 c. chopped green or red bell pepper
1 very large onion, thinly ringed
3/4 c. erythritol/xylitol blend (mix both granular sweeteners at a 50/50 ratio)
1 c. white wine vinegar
1/2 c. very light olive oil
1 1/2 t. sea salt or BioSalt (recipe on this blog)
fresh ground pepper, to taste (40 grinds)


Method:

Drain beans and combine with green pepper and onion.

Combine sugar-free sweetener, vinegar, salt, and ground pepper and mix until sweetener is completely dissolved  (I recommend heating the vinegar mixture in the microwave for about 30 seconds, stirring well and then heating another 30 seconds, and stir again, to help it dissolve).

Add the oil to the vinegar mixture, mix and pour over the vegetables.

Toss well. Chill overnight. Toss again before serving to coat well.


Note: For a variation use garbanzo beans.


Enjoy,

Leila


UPDATE:

I changed the dressing to cut back on the amount of erythritol and xylitol called for. I also varied the vegies used.

Cutting back on the sugar-free sweeteners used saves you money. Plus adding a bit of stevia glycerite to the mix, makes the sweetening blend more synergistic and sugar-like in taste. Trust me, you won't miss the sugar here at all in this recipe!

I used all green beans because I frequently do not have yellow wax beans just hangin' around. The yellow wax beans are my favorite part of the salad though. I used yellow bell pepper for color and for the milder flavor they have. I used both kidney beans and garbanzo beans for more color variety and nutritional purposes. I think this recipe would work fine using fresh green beans too, blanching them first would probably be best.

Do which ever variation you want, they are both good!

Alternate Sugar-Free Three Bean Salad Recipe:

1 50-ounce can (3 lb 2 ounces) canned green beans
1 15-ounce can red kidney beans drained and rinsed
1 15.5-ounce can garbanzo beans drained and rinsed
1 large yellow bell pepper, seeded and chopped
1 very large onion, thinly ringed
1/4 c. erythritol (Lakanto's sweetener is also great)
1/4 c. xylitol
1/4 t. NOW brand stevia glycerite (or homemade stevia glycerite recipe on this blog)
1 c. white wine vinegar
1/2 c. very light olive oil
1 1/2 t. sea salt or BioSalt (recipe on this blog)
fresh ground pepper, to taste (40 grinds)


Method:

Drain beans and combine with yellow bell pepper and onion.

Combine sugar-free sweetener, vinegar, salt, and ground pepper and mix until sweetener is completely dissolved (I recommend heating the vinegar mixture in the microwave for about 30 seconds, stirring well and then heating another 30 seconds, and stir again, to help it dissolve).

Add the oil to the vinegar mixture, mix and pour over the vegetables.

Toss well. Chill overnight. Toss again before serving to coat well.

ENJOY!
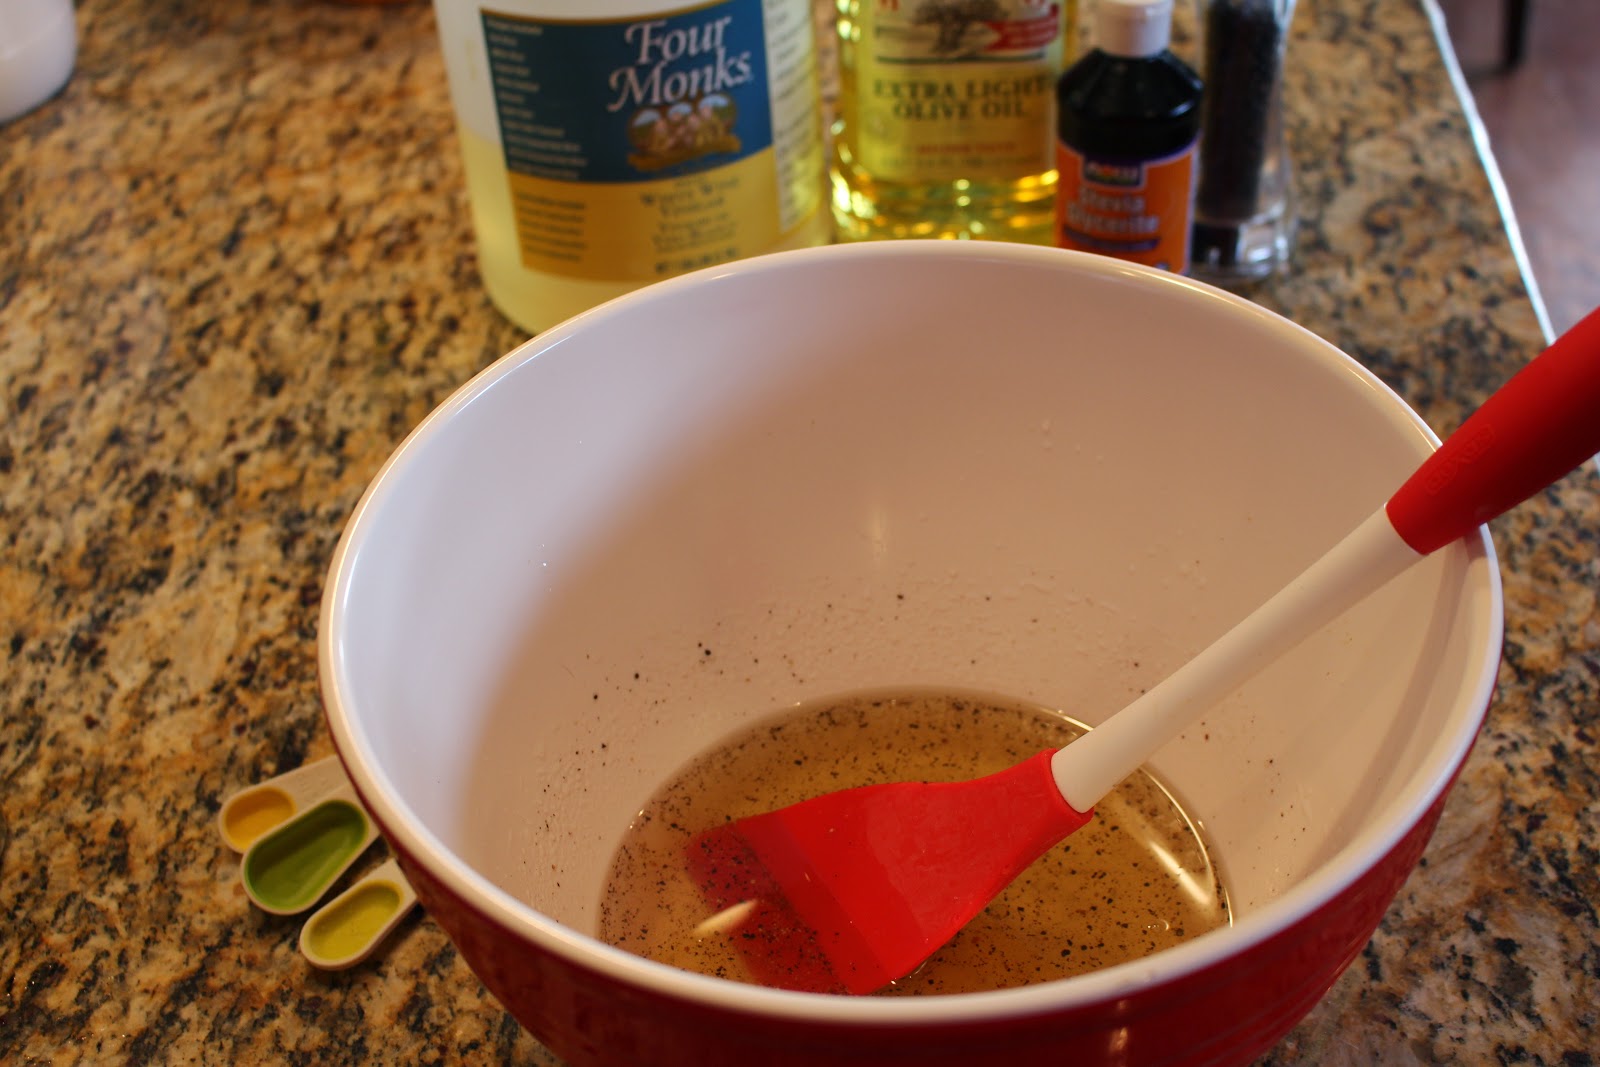

Mixing the sugar-free dressing.

Three-Bean Salad before tossing together.

Tossed  Sugar-Free Three Bean Salad - Ready to marinate.


Variation with thawed frozen green beans.


2nd UPDATE:

Here is another option for you. I changed the dressing again, to lower the amount of erythritol and xylitol called for.

I cut back even further the amount of erythritol and xylitol used in the dressing. Doing this cuts down on the possible effects of consuming sugar alcohols. Xylitol, cool as it is, sometimes gives some people a bit of gastric distress. Erythritol is the gut-friendliest of the sugar alcohols, which is great to know. Sugar alcohols are also more expensive than regular white cane sugar, as I'm sure you've noticed.

I chose to add some food-grade vegetable glycerine to the mix. It is naturally sweet, sugar free, affordable, and has a warming effect, which nicely counteracts the cooling effects of the erythritol and xylitol. Vegetable glycerine also gives a nice syrupy glossiness to this salad dressing.

I still add a touch of stevia glycerite. Just so you know, when you blend these sweeteners, they act synergisticly with each other, enhancing each others sweetness. The result is that when combined they taste more like real sugar. And your gut is happier too.

The salad still tastes great with these new adjustments. You can choose any of these dressing variations, they are all good.

As far as the vegetables go, I used a red bell pepper this time. and I think I prefer slightly less onion, So I used a med-large red onion instead of an extra large onion.

So I'm just giving you another option for making this salad, Your'e welcome :)


2nd Alternate Sugar-Free Three Bean Salad Recipe:

1 50-ounce can (3 lb 2 ounces) canned green beans
1 15-ounce can red kidney beans drained and rinsed
1 15.5-ounce can garbanzo beans drained and rinsed
1 large red bell pepper, seeded and chopped
1 medium-large red onion, thinly ringed
1/4 c. food grade vegetable glycerine
2 T. erythritol
2 T. xylitol
1/4 t. NOW brand stevia glycerite (or homemade stevia glycerite recipe on this blog)
1 c. white wine vinegar
1/2 c. very light olive oil
1 1/2 t. sea salt or BioSalt (recipe on this blog)
fresh ground pepper, to taste (40 grinds)


Method:

Drain beans and combine with yellow bell pepper and onion.

Combine sugar-free sweeteners, vinegar, salt, and ground pepper and mix until sweetener is completely dissolved (I recommend heating the vinegar mixture in the microwave for about 30 seconds, stirring well and then heating another 30 seconds, and stir again, to help it dissolve).

Add the oil to the vinegar mixture, mix and pour over the vegetables.

Toss well. Chill overnight. Toss again before serving to coat well.


TIP: I like to add 1/2 tsp. Psyllium Husk Powder to the dressing to slightly thicken it.


Enjoy!

Author, Leila.

Living Oat Cereal - Try this for breakfast instead of oatmeal.

Sprouted Raw Oat Cereal


This is definitely different than cooked oatmeal but it has it's own charm. Sprouted oats have the advantage of being very digestible. It is a great idea to consume more raw foods, especially sprouts, the cute little power houses that they are.

Chia seeds are all the rage now. You could add a couple teaspoons of chia, and if it sat a while, it would thicken your cereal.

Be brave. try this living cereal.


Sprouted Oat Cereal recipe:

1 c. oat sprouts
2 T. soaked sunflower seeds ("C" Soaked Sunnies - recipe on this blog)
2 T. organic raisins
1/2 c. chopped fresh fruits (like apple, banana, peach, strawberries, Mixed berries)
Almond milk or coconut milk (there are 2 almond milk recipes on this blog)


Method:

How to sprout whole hulled oats: Soak a desired amount of oats in water overnight in a sprouting jar. Drain, rinse, and drain again. Let it continue to drain while placed in your dish-drain angled down on it's side.

Rinse and drain the oats 3 times a day until they just begin to sprout. Drain well and store in your refrigerator until use.


To make 1 serving:

Portion 1 c. sprouted oats in a serving bowl
Top with soaked sunflower seeds, raisins, and fruit of choice.

Pour desired milk over and serve.


Note; Find gluten-free organic oats if that is a concern for you.

Oat Sprouts


Enjoy,

Leila

Alive Sprouted SEED Bread Recipe

Alive Sprouted Seed & Wheat Bread

This is my favorite version of  the 3 sprouted wheat bread recipes on this blog. I love them all though. Again, I slice it up and slather it with organic salted butter. I don;t know how this bread would fair in a toaster, I don;t think too well, but it doesn't need it anyway.

There is much nutritional value in soaking the seeds before adding to the sprouted wheat dough. It removes the enzyme inhibitors that all seeds have and then wakes the seeds up and makes them much more nutritious and bio-available to your body. Cool.

I soak the seeds on baking day, and time it so that they are ready.


ALIVE SPROUTED SEED & WHEAT BREAD Recipe:

2 c. red winter wheat
1/2 c. raw hulled sunflower seeds
4 T. sesame seeds (preferably the brown un-hulled)
2 T. poppy seeds
1 to 2 T. caraway seeds
2 T. flax seeds


Method:

Soak the wheat 6 to 8 hours. Drain then rinse and drain well. Rinse and drain 3 times a day for 3 days.

When the sprout is as long as the wheat berry, drain and let the sprouts dry 3 to 6 hours before grinding (wet sprouts do not grind up as well).

Soak All the seeds except for the flax seeds for 4 hours in purified water. Drain the soaked seeds and let air-dry for 3 to 6 hours. Set aside.

Grind the wheat sprouts in a food processor, wheat-grass juicer or meat grinder. Grind to a smooth paste. Grind a second time if it is lumpy, coarse or chunky, or the bread won't work out as well.

Add the flax seeds and the soaked air-dried seed mixture to the ground wheat sprouts. Mix
until uniformly blended in.

Form the dough. With clean, oiled hands, knead the dough, folding it into itself several times. This will spread the gluten and help the bread stick together and rise better. OR You can go strait to shaping the loaves before popping them into the oven. Form balls of dough about 3-inches in diameter (you should get from 2 to 4 loaves).

Prepare a flat baking sheet. Line a baking sheet with a silicone liner or parchment paper that has been oiled with coconut oil. This bread really sticks!

Place the loaves on the prepared baking sheet. You can dust the prepared baking sheet first with sesame seeds or organic corn meal to help prevent sticking.

Now flatten and form each each dough ball to a height of about 1 1/2-inches and a diameter of about 4 to 5-inches.

Bake in a preheated 250 degree oven on the middle shelf for 2 1/2 to 3 1/2 hours. My mom bakes this bread at 200 degrees for 5 to 6 hours. choose which ever way you desire. You do not want gummy centers, too high a heat leaves it gummy inside and dries out the crust too much. This bread should be moist like brownies.


Enjoy,


Leila

Alive Sprouted Wheat Bread - Moist & Delicious!


Delicious and moist, great slathered with organic salted butter!

This is very similar to the Essene Raisin Bread recipe on this blog. Try this Alive Sprouted Bread if you don't care for raisins. It is wonderful slathered with salted organic butter. Do store this moist bread in the refrigerator. It also freezes well.

Sprouted wheat is much healthier for you than just regular whole wheat flour, however, this is not a gluten-free recipe.


ALIVE SPROUTED WHEAT BREAD Recipe:

2 c. organic red winter wheat

Soak the wheat 6 to 8 hours. drain then rinse and drain well. Rinse and drain 3 times a day for 3 days.
When the sprout is as long as the wheat berry, drain and let the sprouts dry 3 to 6 hours before grinding (wet sprouts do not grind up as well).

Grind the wheat sprouts in a food processor, wheat-grass juicer or meat grinder. Grind to a smooth paste. Grind a second time if it is lumpy, coarse or chunky, or the bread won't work out as well.

Form the dough. With clean, oiled hands, knead the dough, folding it into itself several times. This will spread the gluten and help the bread stick together and rise better. OR You can go strait to shaping the loaves before popping them into the oven. Form balls of dough about 3-inches in diameter (you should get from 2 to 4 loaves).

Prepare a flat baking sheet. Line a baking sheet with a silicone liner or parchment paper that has been oiled with coconut oil. This bread really sticks!

Place the loaves on the prepared baking sheet. You can dust the prepared baking sheet first with sesame seeds or organic corn meal to help prevent sticking.

Now flatten and form each each dough ball to a height of about 1 1/2-inches and a diameter of about 4 to 5-inches.

Bake in a preheated 250 degree oven on the middle shelf for 2 1/2 to 3 1/2 hours. My mom bakes this bread at 200 degrees for 5 to 6 hours. choose which ever way you desire. You do not want gummy centers, too high a heat leaves it gummy inside and dries out the crust too much. This bread should be moist like brownies.


Note: For a tastier bread, you can add chopped dates, chopped nuts, raisins, nut butters, coconut, cinnamon, vanilla, etc... Just mix thoroughly into the ground sprouted wheat.


Enjoy,

Leila

A delicious Raw Sunflower Seed Hummus recipe - And a recipe for Red Bell Paprika

Mom's Sunny Hummus


This is a delicious raw-food recipe my mother created when she was doing exclusively a raw food diet for 2 years. She used to teach living raw food cooking classes and this is one of the recipes she would share.

The complexity of flavors here is delightful. The ingredient list is a bit long, but just get everything out beforehand, then putting it together will be a snap. It's worth it.

This recipe is so tasty, healthy, and decadent, I hope you try it!


SUNNY HUMMUS Recipe:

Prepare the soaked sunflower seeds:

1 c. hulled raw sunflower seeds
1 big pinch ascorbic acid powder (Vitamin C)

Rinse then soak the sunflower seeds in a jar of water with the pinch of ascorbic acid powder added.
Let soak 8 to 10 hours.
Drain and put in a high-powered (VitaMix) blender container.

ADD:

1/3 c. high quality extra-virgin olive oil
1/3 c. raw tahini (sesame seed paste)
3/4 to 1 c. (4 to 5 ounces) cubed raw yellow-skinned summer squash
2 T. fresh lemon juice
2 t. cumin powder
2 t. onion powder
2 t. Nama Shoyu (raw soysauce)
2 t. Star brand yeast flakes (nutritional yeast)
1 t. BioSalt (recipe on this blog)
rounded 1/2 t. garlic powder
1/4 t. Red Bell Paprika (see recipe below) or sweet paprika
1/4 t. ascorbic acid powder
3 to 4 pitted Kalamata olives
1 Pinch tumeric powder (for color)
1/2 to 1 t. toasted sesame seed oil, optional
3/4 to 1 c. water, as needed

Puree together adding water as needed to just freely vortex in a VitaMix blender (a vortex while blending makes a creamier hummus). Puree until smooth and a little warm.

ADD:

1/16 t. finely ground psyllium husk powder (to stabilize the hummus).

Chill the hummus to thicken.


To Serve:

Spread the hummus 1 to 1 1/2-inch thick on a serving dish.
Sprinkle heavily with Red Bell Paprika or sweet paprika.
Pour over top GOLDEN OIL (recipe on this blog), or garlic-chile infused olive oil or UDO'S Oil,
This raw food is excellent slightly fermented (let it sit out on your counter a few hours).
Serve with vegies to dip.


RED BELL PAPRIKA Recipe:

This has a sweeter flavor than regular paprika.

Dehydrate organic red bell peppers that have been diced, in a food dehydrator.
Grind the dried peppers
Mix the ground red bell peppers at a 50/50 ratio with Hungarian paprika.
Store air-tight and use as you would paprika.


Enjoy,

Leila

Golden Delicious Apple Sauce - The best applesauce I've ever had

Golden Lemon Apple Sauce

This was my favorite applesauce when I was growing up. I have good memories of helping my mom make it. The Golden Delicious apples are perfect for the fresh lemon used in this recipe. Since I love the lemon in it so much, I might add a drop or 2 of organic lemon essential oil to amp up the flavor.

You can add another healthy sweetener of choice, but the honey does taste fabulous!


GOLDEN LEMON APPLESAUCE Recipe:

Ripe organic Golden Delicious apples
Apple juice
Raw honey (or a 50/50 blend of xylitol/erythritol for a sugar-free version)
Fresh grated lemon zest
Fresh squeezed lemon juice
Ascorbic acid powder (Vitamin C)


Method:

Wash the apples. cut out the 'belly buttons" and cut into chunks.
Cook with a little apple juice until the apples are soft.
Run the apples through a colander, to remove seeds and skin.
Sweeten to taste with raw honey or healthy sweetener of choice.
Add some lemon juice, lemon zest, and ascorbic acid for tang, to taste.
You can store the applesauce in Zip-lock freezer bags in the freezer.


Tip:  A good ratio of apples to lemons is 12 apples to every 1 lemon (or more lemons if you like).


Note: It is best to use organic lemons for obvious reasons.


Enjoy,

Leila