Sunday, January 31, 2016

Pork Carnitas Pizza

Pork Carnitas Pizza


Mildly sweet and spicy, this is a unique spin on pizza. Our Family likes it. You can make the carnitas in advance but it is super easy to make 4 hours before dinner. You will have leftover meat too. Think salad topper, burrito or taco filling... Oh joy.

You can make this easy pizza dough in advance and store it in the refrigerator as well. I don't even roll it out, I just pat it with oiled fingers right in the baking sheet. Nice.

The honey drizzle on top may sound unusual, but trust me, it adds the perfect touch.


Pork Carnitas Pizza Recipe:

Carnitas:

2 t. chili powder
1 t. ground cumin
1 t. BioSalt or sea salt
1/2 t. onion powder
1/4 t. garlic powder
1/2 t. fresh ground black pepper
3 to 4 pound pork roast, fresh or thawed
1 T. deodorized coconut oil
24 ounces pineapple juice (you may also use mango juice)


Pizza:

1 recipe pizza dough (recipe follows)
Deodorized coconut oil, as needed
1 c. prepared tomatillo salsa
12 ounces shredded mozzarella
1 large onion, sliced thin
1 large mild green chili pepper, seeded and sliced thin
1 red bell pepper, seeded and sliced thin
1 pinch baking soda
1 pinch sea salt
Olive oil for drizzling
Honey for drizzling
4 scallions, minced
1/4 c. minced fresh cilantro, for serving
Green tomatillo salsa, for serving
Guacamole, for serving
Sour cream, for serving


Method:

Carnitas:

Preheat your oven to 300 degrees F.

Mix the spices and salt together. Rub onto the entire surface of the pork meat.

Heat a large dutch oven (with a tight-fitting lid) on medium-high, add the coconut oil and sear the roast on all sides until brown, about 2 minutes per side.

Pour the pineapple juice over the roast, cover and place in the preheated oven for about 4 hours, or until the meat is fall-apart tender.

Shred the meat in the pot with 2 forks, stir into the juice and cover to keep warm.


Pizza:

Preheat oven to 500 degrees F.

Saute the onion and peppers in a bit of deodorized coconut oil, plus a pinch of baking soda and sea salt, until nicely caramelized.

Brush a rimmed baking sheet with coconut oil.

Flip the pizza dough from the bowl to the baking sheet and evenly pat dough out to the edges.

Spread a thin layer of tomatillo salsa over the dough. Top with mozzarella. Then top with carmelized onions and peppers.

Bake the pizza for 14 minutes, or until crust is golden and cheese is bubbly.

Pull the pizza from the oven. Cut into 8 slices with kitchen shears. Top each slice with a generous amount of the Carnitas, then drizzle with honey and a little olive oil. Sprinkle  the top with scallions and cilantro and serve immediately.


Pizza Dough Recipe:

1 scant tsp. instant yeast (like SAF)
1 pinch sugar or a few drops of raw honey
3/4 c. warm water
2 c. all-purpose flour (or 50/50 blend of white and whole wheat flour)
1 heaping 1/2 t. BioSalt or sea salt
3 T. extra-virgin olive oil


Method:

It a stand mixer with paddle attachment, dissolve the yeast and sugar in the warm water and let proof 10 minutes.

Pour in salt, olive oil, and then the flour and mix on low until fully combined and balled up around the paddle.

Scrape out the dough, oil the bowl and place the dough ball back inside the oiled bowl. Rub a bit of oil on top of the dough.

Cover the bowl with plastic wrap or a damp clean cloth and let rise for an hour before using.

You may also chill the dough for up to a week, and use for pizza later. This recipe doubles or triples well.


Photos of the Process:


Enjoy, 

Leila.

Zippy & Refreshing Lime Quinoa Salad - Gluten Free & Healthy


This healthy, vibrant salad is very fresh tasting and delicious. It's an easy keeper in the fridge and is a nice staple to have around for quick meals.

The lime makes the salad bright tasting and the maple syrup tempers the acidity perfectly.

You may serve this with gluten-free corn chips, served over top romaine lettuce or baby spinach, as a lettuce wrap filling, or eat it as-is. It's all good.

You can omit any salt in the recipe so that the salad stores well in your refrigerator a few days without getting watery. Add a touch of salt, to taste, to the portion that is served.

I hope you enjoy this nutritious, easy to make salad as much as we do!


Refreshing Lime Quinoa Salad Recipe:

Salad:

1 c. quinoa
2 c. water
1 can black beans, rinsed well
2 large tomatoes, diced small
4 small scallions, including the green tops, minced (or 2 large)
1/2 c. chopped cilantro leaves

Dressing:

zest of 2 large limes (about 1 heaping T.)
1/4 c. fresh lime juice (about 2 large limes)
1/4 c. extra virgin olive oil (or rice bran oil)
2 T. real maple syrup
1/2 to 1 t. BioSalt or sea salt
1 to 2 t. salt-free seasoning of choice, optional


Method:

Place the quinoa in a large fine mesh strainer. Rinse the quinoa and soak at least 15 minutes in a bowl of water, and rinse again.

Simmer the quinoa and the 2 cups water in a pot, uncovered, for about 10 minutes. Turn off the heat, cover, and let stand on the burner for another 10 minutes.

Strain off any excess water, then let cool as you prepare the rest of the salad.

Combine the dressing ingredients together in a serving bowl, to taste.

Add the cooked quinoa to the salad dressing and toss well.

Add the drained black beans, tomato, scallions, and fresh cilantro and toss well.

Serve warm or chill and serve cold.


NOTE: 

If you plan on storing in the fridge for 2 to 3 days, only add salt at serving time, as you eat it. This prevents the tomatoes from releasing as much juice, eliminating liquid at the bottom of the bowl. If liquid does accumulate, no worries, just stir and serve.


Enjoy,

Leila.

Mexican Style Quinoa Salad - Excellent, Gluten Free, Quick & Easy!

Mom's Mexican Style Quinoa Tabouli

This is a fabulous salad. It is flavorful, gluten-free and packed with healthy deep leafy greens. It is a salad that is hard to get tired of. You can make this ahead of time to enjoy for several meals with a side of clean protein. It's great to take as a lunch for work, or take on picnics, or just to have on-hand when you are in a hurry and need something good for you that's ready to go. The choice of foods we eat when we are in a hurry are frequently the things we regret eating later (I'm not pointing any fingers... soda and candy bar ).


There are other delicious variations to this quinoa tabouli salad that I have already posted on this blog: Classic, Italian, and Oriental style.


MEXICAN  STYLE  QUINOA  TABOULI  Recipe:

Serves 4 to 6

2 c. cooked quinoa (or cooked sprouted quinoa), cooled
1/4 c. fresh lemon juice, to taste
1/2 c. olive oil (or Green Oil recipe on this blog)
A pinch of. ascorbic acid powder (vitamin C)
1 garlic clove, pressed through a garlic press
2 large scallions, thinly sliced
2 T. dried Mexican oregano, to taste
1 t. ground cumin, to taste
1/2 to 1 large bunch cilantro, with stems, chopped fine
1 large bunch flat-leaf Italian parsley, without coarse stems, chopped fine
1/2 bunch dark kale, collard or broccoli leaves, chopped fine (use half as much kale as parsley)
2 small to medium zucchini, cubed small (about 1/4th-inch squares
1 yellow bell pepper, cored, seeded, and diced small
Minced jalapenos, to taste


Garnish:

Pepper Jack cheese, diced into small cubes
3 medium tomatoes, diced small
Kalamata olives
BioSalt (recipe on this blog)


Method:

Mix all listed ingredients together thoroughly, adding lemon juice to taste.
Pack in air-tight containers in the refrigerator.
This keeps well several days because no salt has been added yet.
To serve, salt only your individual serving, to taste.
Garnish with fresh chopped tomatoes and serve.
Remember, DO NOT ADD SALT if you plan on storing any length of time


Notes:

Adding salt or any ingredients containing salt to the quinoa salad makes the juices leach out and get watery and yucky. You will not be able to store it in the refrigerator either.

That includes cheeses, soy sauce, Bragg's Aminos, etc...

Add salt and your salty ingredients only when eating it - because it does need salt!

Ascorbic acid powder added to all of your quinoa Tabouli salads has the big benefits of increasing the salad's shelf-life, keeping it fresh flavored longer. It also keeps the greens crisp and green


Enjoy!

Leila.

Italian-Style Quinoa Salad - Delicious, Gluten Free, and easy!

Mom's Italian Style Quinoa Tabouli


This is a fabulous salad. It is flavorful, gluten-free and packed with healthy deep leafy greens. It is a salad that is hard to get tired of. You can make this ahead of time to enjoy for several meals with a side of clean protein. It's great to take as a lunch for work, or take on picnics, or just to have on-hand when you are in a hurry and need something good for you that's ready to go. The choice of foods we eat when we are in a hurry are frequently the things we regret eating later (I'm not pointing any fingers... soda and candy bar ).

This is a staple in our homes. My dad eats it every day and loves it! My mom and dad make it together and there is always some in their refrigerator. My dad has his black-belt in JUDO and instructs several Judo classes every week. This quinoa salad helps him stay lean and mean. My kids have a grandpa with a 6-pack (and I'm not talking about a 6-pack of root beer). Way to go dad!

There are other delicious variations to this salad that I will be posting...


ITALIAN  STYLE  QUINOA  TABOULI  Recipe:

Serves 4 to 6

2 c. cooked quinoa (or cooked sprouted quinoa), cooled
1/4 c. fresh lemon juice, to taste
1/2 c. extra-virgin olive oil (or Green Oil recipe on this blog)
A pinch of. ascorbic acid powder (vitamin C)
2 garlic cloves, pressed through a garlic press
2 large scallions, thinly sliced
2 T. dried Italian herb seasoning blend, to taste
1 large bunch flat-leaf Italian parsley, without coarse stems
1/2 bunch dark kale, collard or broccoli leaves, chopped fine (use half as much kale as parsley)
2 small to medium zucchinis, cubed small (about 1/4th-inch squares)
1 red bell pepper, cored, seeded, and diced small, optional


Garnish:

3 medium tomatoes, diced small
Fresh grated parmesan cheese
Italian olives
BioSalt (recipe on this blog)


Method:

Mix all listed ingredients together thoroughly, adding lemon juice to taste.
Pack in air-tight containers in the refrigerator.
This keeps well several days because no salt has been added yet.
To serve, salt only your individual serving, to taste.
Garnish with fresh chopped tomatoes and Parmesan cheese then serve.

Remember, DO NOT ADD SALT if you plan on storing any length of time


Tips:

If dried herbs are used, the flavor may be a little flat tasting. You can amp up the flavor by adding some additional dried oregano plus dried basil, to taste.


Note:

Adding salt or any ingredients containing salt to the quinoa salad makes the juices leach out and get watery and yucky. You will not be able to store it in the refrigerator either.

That includes cheeses, soy sauce, Bragg's Aminos, etc...

Add salt and your salty ingredients only when eating it - because it does need salt!

Ascorbic acid powder added to all of your quinoa Tabouli salads has the big benefits of increasing the salad's shelf-life, keeping it fresh flavored longer. It also keeps the greens crisp and green


Enjoy!

Leila.

Oriental Style Gluten-Free Quinoa Salad - A Delicious Recipe

Mom's Oriental Style Quinoa Tabouli 


This is another fabulous salad. It is flavorful, gluten-free and packed with healthy deep leafy greens. It is a salad that is hard to get tired of. You can make this ahead of time to enjoy for several meals with a side of clean protein. It's great to take as a lunch for work, or take on picnics, or just to have on-hand when you are in a hurry and need something good for you that's ready to go. The choice of foods we eat when we are in a hurry are frequently the things we regret eating later (I'm not pointing any fingers... soda and candy bar ).

This is a staple in our homes. My dad eats it every day and loves it! My mom and dad make it together and there is always some in their refrigerator. My dad has his black-belt in JUDO and instructs several Judo classes every week. This quinoa salad helps him stay lean and mean. My kids have a grandpa with a 6-pack (and I'm not talking about a 6-pack of root beer). Way to go dad!

There are other delicious variations to this salad that I will post later.


ORIENTAL  STYLE  QUINOA  TABOULI  Recipe:

Serves 4 to 6

2 c. cooked quinoa (or cooked sprouted quinoa), cooled
1/4 c. rice vinegar, to taste
1/4 c.raw sesame oil
1/4 c. rice oil
2 t. toasted sesame seed oil, to taste
A pinch of. ascorbic acid powder (vitamin C)
2 large scallions, thinly sliced
2 T. grated fresh ginger root, to taste
2 T. toasted sesame seeds
1 large bunch flat-leaf Italian parsley, without coarse stems
2 peeled and grated organic carrots
1/2 bunch dark kale, collard or broccoli leaves, chopped fine (use half as much kale as parsley)
2 medium cucumbers, peeled, large seeds removed, and cubed small (about 1/4th-inch squares)


Garnish when serving only because it contains salt:

Tamari soy sauce (gluten-free)


Method:

Mix all ingredients together thoroughly, adding ginger, rice vinegar and toasted sesame oil to taste.
Pack in air-tight containers in the refrigerator.
This keeps well several days because no salt has been added yet.
To serve, season individual portions with Tamari, to taste.

Remember, DO NOT ADD SALT if you plan on storing any length of time


Plain Quinoa


Note:

Adding salt or any ingredients containing salt to the quinoa salad makes the juices leach out and get watery and yucky. You will not be able to store it in the refrigerator either.

That includes cheeses, soy sauce, Bragg's Aminos, etc...

Add salt and your salty ingredients only when eating it - because it does need salt!

Ascorbic acid powder added to all of your quinoa Tabouli salads has the big benefits of increasing the salad's shelf-life, keeping it fresh flavored longer. It also keeps the greens crisp and green


Enjoy!

Leila.

Amazing Quinoa Tabouli - Make ahead for quick meals

Mom's Quinoa Tabouli

This is a fabulous salad. It is flavorful, gluten-free and packed with healthy deep leafy greens. It is a salad that is hard to get tired of. You can make this ahead of time to enjoy for several meals with a side of clean protein. It's great to take as a lunch for work, or take on picnics, or just to have on-hand when you are in a hurry and need something good for you that's ready to go. The choice of foods we eat when we are in a hurry are frequently the things we regret eating later (I'm not pointing any fingers... soda and candy bar ).

This is a staple in our homes. My dad eats it every day and loves it! My mom and dad make it together and there is always some in their refrigerator. My dad has his black-belt in JUDO and instructs several Judo classes every week. This quinoa salad helps him stay lean and mean. My kids have a grandpa with a 6-pack (and I'm not talking about a 6-pack of root beer). Way to go dad!

There are delicious variations to this salad that I will post later. Note: These have now been posted:

See our Oriental-Style Quinoa Tabouli recipe.
See our Itallian-Style Quinoa Tabouli recipe.
See our Mexican-Style Quinoa Tabouli recipe.


Try this Tabouli recipe with this amazing Chicken Bake recipe HERE.


QUINOA TABOULI Recipe:

Serves 4 to 6

2 c. cooked quinoa (or cooked sprouted quinoa), cooled
1/4 c. fresh lemon juice, to taste
1/2 c. olive oil (or Green Oil recipe on this blog)
A pinch of. ascorbic acid powder (vitamin C)
1 garlic clove, pressed through a garlic press
2 large scallions, thinly sliced
2 T. dried dill weed (or fresh dill weed to taste)
2 T. dried mint leaves, crumbled (or fresh mint to taste)
1 large bunch flat-leaf Italian parsley, without coarse stems
1/2 bunch dark kale, collard or broccoli leaves, chopped fine (use half as much kale as parsley)
2 medium cucumbers, peeled, large seeds removed, and cubed small (about 1/4th-inch squares)


Garnish:

3 medium tomatoes, diced small
BioSalt (recipe on this blog)


Method:

Mix all listed ingredients together thoroughly, adding lemon juice to taste.
Pack in air-tight containers in the refrigerator.
This keeps well several days because no salt has been added yet.
To serve, salt only your individual serving, to taste.
Garnish with fresh chopped tomatoes and serve.

Remember, DO NOT ADD SALT if you plan on storing any length of time


Tips:

If dried herbs are used, the flavor may be a little flat tasting. You can amp up the flavor by adding some dried oregano plus dried basil, to taste. Or add dried oregano plus a touch of dried tarragon (tarragon is a potent herb, so a little goes a long way).

You may also grind dill seeds in a seed mill and add a touch of the powder to your quinoa.

You may also use essential oils of dill seed and/or spearmint. Do not overdo it! Touch a clean finger to the essential oil dispenser so that you have less than a drop. Rub the oil off of your finger and onto the inside bottom of your mixing bowl before the other ingredients are added. Add the salad oil and mix well, to dilute it. You don't want an essential oil hot spot in your salad! Add the rest of the ingredients and toss well.


Note:

Ascorbic acid powder added to all of your quinoa Tabouli salads has the big benefits of increasing the salad's shelf-life, keeping it fresh flavored longer. It also keeps the greens crisp and green

Adding salt or any ingredients containing salt to the quinoa salad makes the juices leach out and get watery and yucky. You will not be able to store it in the refrigerator either.

That includes cheeses, soy sauce, Bragg's Aminos, etc...

Add salt and your salty ingredients only when eating it - because it does need salt!


Enjoy!

Leila and Nancy

Tuesday, December 1, 2015

Pistachio Cream Cheese Fingers

These cute little pastel green fingers taste amazing.


These Pistachio Cream Cheese Fingers are rich and moist with cream cheese and chocolate. They are a fun shape and are a hit at parties. Best of all, they are easy to make.

This is another delicious dessert I served at my beauty salon's Customer Appreciation Nights. These events were full of food and fun, I tell ya. See my previous post for my yummy Apple Strudel Bars, which were also served at these beauty events.


Pistachio Cream Cheese Fingers Recipe:

1 c. sugar
1 c. real butter, softened
1 8-ounce package cream cheese, softened
1 t. real vanilla extract
1 large egg
2 1/4 c. flour
 3 3/4-ounce box Instant Pistachio flavored Pudding & Pie Filling Mix
1 t. baking powder
1/2 t. sea salt
3 ounces semi-sweet chocolate
1 t. deodorized coconut oil


Method:

In a large bowl, beat the sugar, butter, and cream cheese until fluffy.
Add the vanilla and egg;beat well. Set aside.
Lightly spoon flour into measuring cup; level off and pour into a medium bowl.
Add the dry pudding mix, baking powder, and salt. Whisk to combine.
Add the flour mixture to the cream cheese mixture; mix well.
Cover the dough with plastic wrap and chill at least 1 hour for easier handling.
Preheat oven to 350 degrees F. Grease cookie sheets.
Shape teaspoonfuls of chilled dough into 1 1/2-inch fingers.
Place on prepared cookie sheets.
Bake 9 to 12 minutes, or until set. Cool completely.
In a small sauce pan, melt the chocolate and coconut oil together, with stirring until well blended.
Drizzle a small amount of chocolate over each cookie and let set up completely before transferring.


Enjoy,

Leila.

Food Stylist 
& Hair Stylist!

Banana Nugget Cookies (With Chocolate & Oats)

Here is a yummy way to use up your old over-ripe bananas. 

These cookies are very moist, with a pleasant touch of spice and just the right amount of chocolate to make them truly delicious!

These cookies are very quick to mix up and bake. They store well for a few days, and are great to pack into school lunches or take along on picnics. kids, as well as adults, really like them too.

You can even freeze your old bananas and then thaw them out later to use in this cookie recipe.


Banana Nugget Cookies Recipe:

3/4 c. real butter or deodorized coconut oil
1/2 c. sugar
1/2 c. brown sugar
1 large egg
1 1/2 c. sifted flour
1/2 t. baking soda
1 t. sea salt or BioSalt
1/4 t. fresh grated nutmeg
3/4 t. cinnamon
1 c. ripe mashed bananas (about 2 large)
1 3/4 c. old fashioned rolled oats
6 ounces semi-sweet chocolate chips


Method:

Cream fat, sugars and egg.
Sift together dry ingredients.
Add dry ingredients alternately to creamed mixture with bananas.
Stir in oats and chocolate chips.
Drop by teaspoons onto a lightly greased baking sheet.
Bake in a preheated 375 degree oven, for 13 minutes.


Enjoy, 

Leila.

La France Spinach Salad - A REAL French Restaurant recipe

La France Spinach Salad

There used to be a fabulous French restaurant called La France on University Ave. in Provo, Utah, that we loved. This is their salad recipe. We would order this yummy salad all the time. My mom has a way of talking with people, and they give her recipes that they won't normally give out. The restaurant has been gone for many years, so I feel good about sharing this recipe now.

The tarragon vinegar is excellent in this dressing, and is worth seeking out. The flavors and textures in this salad harmonize beautifully, I think you will love it too.

This salad is a delicious meal all by itself.


La France Spinach Salad Recipe:

Dressing:

2/3 c. sour cream
1/3 c. Best Foods mayonnaise (or healthy diet mayonnaise)
1 T. tarragon vinegar
onion salt, to taste
fresh ground pepper, to taste

Salad:

2 to 3 large bunches of fresh spinach, washed, stemmed, and dried in a salad spinner
3 slices crisp diced bacon, crumbled
sliced avocado
sliced tomato
3 to 4 hard boiled eggs


Method:

Mix the dressing ingredients together, seasoning to taste with the onion salt and pepper.

Put the prepared spinach into a large mixing bowl.

Toss the spinach with the dressing.

Immediately portion spinach mixture onto 3 individual shallow soup bowls.

Top each salad with an equal portion of bacon.

Top each salad with an avocado slice and a tomato slice.

Top each salad with an equal portion of hard boiled eggs pressed through a ricer.

Serve immediately.


Note: This is the restaurant's representation of this salad. personally, I load up on the sliced avocado and ripe tomato (if the tomatoes are not ripe and juicy, 1 slice as a garnish works fine).


Potato Ricer


Enjoy, 

Leila

Monday, November 30, 2015

Dark Chocolate Cherry Almond Clusters - Costco Copy-Cat - Make your own and save some money!

Dark Chocolate Almond Cherry Clusters

We bought these at Costco and loved them. They are very easy to make yourself. I like portioning them out with a mini cookie scoop, they look professionally made that way.

I think these are best with tart dried cherries, otherwise known as pie cherries. I find lightly sweetened dried tart cherries at Costco. Costco usually has the roasted whole almonds too.

I love using Lakanto's new sugar-free dark chocolate, which was formulated by my amazing mom. It really is the best, plus it's healthy!

Enjoy the benefits of the antioxidants and protein packed in these little babies.


Almond Cherry Clusters Recipe:

16 ounces sugar-free dark chocolate (like a 72%)
8 to 10 ounces dry-roasted whole almonds (salted is o.k.)
8 to 10 ounces dried TART cherries


Method:

Melt and temper the chocolate.
Stir in the almonds and cherries.
Drop by Tablespoonfuls onto parchment or silicone lined cookie sheets.
Cool in the fridge, in front of a fan, or outside if its cool.
Store airtight once set up.

Makes 2 cookie sheetfuls.


Note: To save money, alter the ratio of almonds to the cherries, to cut costs.
ie. 16-oz chocolate, 12-oz almonds, 8-oz cherries, works well.


Enjoy!

Leila.

Broccoli Stem Salad - A delicious unique salad recipe - Easy to make and very good for you

Flaked Broccoli Stem Salad

Finally a great use for those broccoli stems you don't know what to do with. When you are preparing broccoli, reserve the stems for this salad. It's yummy.

I had this salad at my parents house in 2005. It's another of my mom's creations. It is very high in fiber and makes a great lunch or side. The texture is great, and there is an array of complimentary flavors, like sweet, tangy, savory... YUM.

Look on this blog for the recipe for Dad's Dressing. It is very easy to make and is preferred for this salad.


FLAKED BROCCOLI STEM SALAD RECIPE:

1 pound raw broccoli stems, peeled and flaked into 1 1/2-inch lengths (can use a sharp vegie peeler)
1/2 to 2/3 c. cubed roma tomatoes, or 2 to 4 T. flavored sun-dried tomatoes, chopped
Pitted black olives, to taste

Dad's Dressing, to taste

Garnish: Pine nuts, "Crispy Walnuts", or Spicy Seasoned Pepitas (pumpkin seeds)


Method:

Mix up the salad to taste, toss with "Dad's dressing", and garnish as desired.
Serve immediately.


Note:

See the recipe for "Crispy Soaked Almonds", to see how to make in advance the Crispy walnuts. the process is the same. Our method makes walnuts have a much better taste and texture!


Enjoy,

Leila


Tuesday, November 17, 2015

Red & Green Italian Salad - A delicious hearty Italian salad with an easy homemade dressing

Red & Green Italian Salad

This is a hearty beautiful salad and can make a meal by itself. It is something different to take on a picnic or pot-luck.

This is an easy recipe to adjust for specific diets like paleo, low-carb, vegan, gluten-free, or dairy-free. Use gluten-free pasta or omit the pasta altogether if you want to. Omit the cheese if you avoid dairy.


RED & GREEN ITALIAN SALAD Recipe:

Salad Ingredients:

1 can jumbo pitted black olives
2 c. cooked gluten-free large shell macaroni, or other shape if desired
1 4-ounce jar pimentos with juice, sliced into strips
4 to 5 small zucchini, sliced thick
1 quart lightly steamed broccoli, cut into uniform bite-sized pieces
1 quart lightly steamed cauliflower, cut into uniform bite-sized pieces
1 medium red onion, sliced in rings
1 to 2 dozen small mushrooms, stemmed and sliced in half

Dressing ingredients:

1/2 c. good olive oil, or more
1/2 c. red wine vinegar
1 to 2 garlic cloves, well smashed
1/2 to 1 t. sweet paprika
1 t. fennel seed (soaked in water to soften, then drained)
1 t. dried oregano
BioSalt, to taste (recipe on this blog)
Fresh ground pepper, to taste
Mozzarella or Jack cheese, cubed, optional

Garnish:

Freshly grated Parmesan cheese, optional


Method:

In a large bowl, toss the salad ingredients together.

In a separate mixing bowl, combine the salad dressing ingredients together. Season it well.

Pour the well-mixed dressing over the salad ingredients and toss together thoroughly.

Marinate 1 hour.

Serve garnished with Parmesan cheese, if desired.


Note: You can serve this salad on a bed of lettuce.


Enjoy,

Leila

Monday, November 16, 2015

Best Old Fashioned Fruit Ice Cream


Here is another family favorite summer recipe... The BEST ice cream ever!

This old fashioned ice cream is the ultimate warm weather comfort food. The variety of fruit flavors are balanced perfectly in this ice cream. There is great texture from the generous chunks of fruit and the fresh citrus brightens it up beautifully. Then there is the perfect amount of rich whipping cream to make it truly decadent. You will love it! We use one of those old-fashioned ice cream makers that use rock salt and allow you to make a large batch. I like to make this ice cream for family birthday parties, other holidays, and summer Sunday dinners...


Best Old Fashioned Fruit Ice Cream Recipe:

3 c. whipping cream
3 c. milk
3 c. sugar
1 t. real vanilla
zest of 1 orange
zest of 1 lemon
juice of 3 oranges
juice of 3 lemons
3 bananas, chopped
1 can crushed pineapple and it's juice AND/OR 1 c. cut up strawberries
pinch sea salt
1/2 t. guar gum, optional


Method:

Premix the guar gum into the sugar, if using and then mix everything together.
Freeze in a large ice cream freezer.


Variation:

1 quart milk
1 pint half-and-half
1 pint whipping cream
2 c. canned milk
4 1/2 c.sugar
3 lemons, juiced
2 cans frozen strawberries
4 bananas, mashed
pinch of sea salt


Enjoy,

Leila.


Sunday, November 15, 2015

Winona Mordu's Old Fashioned Whole Wheat Cake (with a reduced sugar variation)

This easy and unique snack cake is very moist and delicious - And much healthier than most other cakes!

The rich pecan topping gives a great twist to a whole wheat cake, keeping it moist and tender inside. The spices in it remind me of a great spice cake, and I like that it is higher in fiber and has more complex carbohydrates than a regular cake made with white flour. Don't let the cream and butter throw you, these fats actually slow down the absorption of the sugars here. Fats also keep cakes moist and tender. Just please do not use hydrogenated shortening! Again, I recommend using salted butter, not unsalted butter for best flavor.

This cake comes from my childhood. My mom made it frequently and I still love it to this day. Who was Winona Mordu? She is the woman my mom got this recipe from, when she was a young woman. The cake has kept her name ever since. Thank you Winona, where ever you are...


Winona Mordu's Whole Wheat Cake Recipe:

CAKE:
3 c. freshly ground whole wheat flour
3/4 c. oil (rice bran oil or liquid deodorized coconut oil)
2 c. dark brown sugar
4 large eggs, beaten
1 c. buttermilk
1 t. sea salt or BioSalt
1 t. baking soda
1 t. baking powder
2 t. real vanilla extract
2 t. cinnamon
1 t. fresh ground nutmeg
1/2 t. cloves
1/4 t. fresh ground black pepper

TOPPING:
1/4 c. cream
1/4 c. butter
2 c. dark brown sugar
2 T. dark corn syrup
1 c. chopped pecans, or more to taste


Method:

CAKE:
Preheat the oven to 350 degrees F.
Mix in a bowl: oil, sugars, eggs, salt, baking soda, baking powder, vanilla, and spices.
Then add the flour and buttermilk and mix together.
Pour batter into a 9 X 13-inch pan and bake from about 40 to 45 minutes. Check the cake at 30 minutes. Do not over bake the cake.
Remove the cake from the oven and let cool 5 minutes before adding the topping.

TOPPING:
Combine the cream, butter, brown sugar, and corn syrup in a sauce pan and bring to a boil.
Boil hard 1 minute.
Pour and spread the hot topping over the hot cake
Immediately sprinkle the top with all the chopped pecans it will hold.
Let the cake cool to room temperature before slicing into.

TIP: Toasting the fresh pecans first improves the flavor further.


Reduced Sugar Variation:

CAKE:
Substitute 3 1/4 c. finely ground whole wheat flour for the 3 cup whole wheat flour.
Substitute  1 1/4 c. fructose plus 1/2 c. dark molasses for the dark brown sugar.
Substitute 2 T. cinnamon for the 2 t. cinnamon.

Proceed with the rest of the recipe as directed above.

TOPPING:
Instead of the topping above mix together:
2/3 c. fructose, 2/3 c. sorghum sweetener, 2 T. cream, 3 T. butter.

Cook topping as directed above and top the cake as instructed.


Enjoy!

Leila.

Refreshing Homemade Frozen Fruit Cocktail (2 Variations)

Enjoy this refreshing fruity treat this summer and cool down with style. 

This is a hit at family gatherings and parties. You can vary the fruits to your liking and use what's in season. Just make sure you use ripe sweet fruit for the best results.

I have yet to make this sugar-free. When I do convert this recipe, I will use fresh pineapple chunks instead of canned. I will also use fresh lemon juice and then I will sweeten it with a mixture of erythritol, xylitol, and add a little stevia glycerite to taste.

There are 2 versions below. The first recipe calls for more varieties of fruit and makes a bulk batch. The second recipe is smaller and the ingredients are simplified. Have fun playing with both.


Homemade Fruit Cocktail Recipe:

4 to 6 c. sugar
4 c. water
3 pounds peaches (about 12-15 medium)
3 pounds pears (12-15 medium)
3 pounds seedless grapes
5 bananas, optional
1 can pineapple chunks, drained and juice reserved
Maraschino cherries, optional
1 12-ounce can frozen lemonade


Method:

Boil the sugar and water together until syrupy. Let cool!
Cut up the fruit into bite-sized pieces.
To cooked syrup add 1 can unsweetened pineapple juice and 1 12-ounce can frozen lemonade (undiluted). Mix together well.
Pour over fruit and gently mix together.
Freeze in pint-sized freezer bags, about 2 1/2 cups to a bag.


To Serve:

Pull a bag out of the freezer and let soften a bit.
Serve when still a bit frozen with 7-UP (soda) in a serving glass.
Alternately, serve on a lettuce leaf.
Or serve as a dessert with sherbet and 7-UP or Sprite.


Homemade Fruit Cocktail Recipe # 2:

3 pounds peaches (about 12-15 medium)
2 c. sugar
1 pound seedless grapes
1 #21-can crushed pineapple (1 2/3 c.)
2 lemons, juiced (about 1/2 c.)
Maraschino cherries, optional


Method:

Peel peaches and cut into bite-size pieces.
Sprinkle the peaches with the sugar and allow to stand while preparing the rest of the fruits.
Wash and stem the grapes and stir into the peaches along with the remaining ingredients.
Freeze in pint-sized freezer bags, about 2 1/2 cups to a bag.


To Serve:

Pull a bag out of the freezer and let soften a bit.
Serve when still a bit frozen with 7-UP (soda) in a serving glass.
Alternately, serve on a lettuce leaf.
Or serve as a dessert with sherbet and 7-UP or Sprite.


Enjoy,

Leila.

Kettle Turkey Pot Roast (tastes like beef!) - Copy Cat Chuck-A-Rama Recipe


Kettle Turkey Pot Roast
Imagine tender chunks of savory turkey that fool you into thinking you are eating slow simmered roast beef! 

I LOVE this recipe. My family loves this recipe. I think you will love it too.

Chuck-A-Rama does a great job of making their kettle turkey pot roast. Have you had it? It's by the roast beef, you must try it. It tastes like very tender roast beef with yummy carrots and potatoes, swimming in a tasty broth.

I have also had another version of this at a restaurant I can't remember the name of, that was equally delicious. This version version had a delicious thicker gravy and a ton of black pepper - zowie! A bit much for tender mouths. Chuck-A-Rama's Kettle Turkey has a much thinner brothy sauce that is delicious, but makes a lousy gravy, since it just runs off everything.

I decided it was time for me to recreate a version at home that is the best of both worlds. I wanted a thicker gravy-like sauce that wasn't quite so peppery. I wanted the big chunks of tender fall-apart meat. I wanted it to taste beefy, not like turkey. And I wanted lots of carrot and potato chunks too.

I'm thrilled with the results and my family loves it. I created this recipe around 2008,and I have made it when ever I see turkey thighs being sold at my local market. It's great that you do not have to thaw the meat first. This recipe is very forgiving, as you will see with the 2 variations I have listed below the recipe.


Crock Pot Turkey Pot Roast:

1 large onion, diced into cubes
2-3 turkey thighs (about 3 to 4 lbs, frozen)
1 t. seasoned salt, to taste
60 grinds fresh black pepper
2 cloves garlic, mashed
1 envelope dry Lipton Onion Soup Mix
1-2 t. organic beef base
1/4 c. sherry cooking wine, optional
1 t. Worcestershire sauce
1/2 t. Herbs de Province
1 bay leaf, optional
2 3/4 c. water
1 3-ounce package brown gravy mix (or mushroom)
12 carrots, peeled and cut into big chunks
6 to 8 potatoes, peeled or unpeeled, cut into big chunks
4 to 6 ribs celery, cut into big chunks, optional


Method:

Place the cubed onion in the bottom of a large oval shaped crock pot.

Season the frozen or thawed turkey thighs with seasoned salt and pepper. Place in the crock pot on top of the onions.

Add to the crock pot the garlic, onion soup mix, beef base, sherry, Worcestershire, Herbs de Province, bay leaf, and water.

Cover and cook 3 or more hours (until the meat is fall-of-the-bones tender).

Lift meat out of the crock pot and remove skin and bones, leaving big chunks of meat. Set aside.

To the crock pot add the package of brown gravy mix. Stir to combine with the hot liquid remaining in the crock pot.

Add all of the chunked carrots, potatoes, and celery to the crock pot. Toss to coat with the sauce.

Return the boned turkey to the crock pot. Lay the meat on top and gently spoon some of the sauce over top.

Place lid on crock pot and cook another hour or so, until the vegetables are tender.

Add more water as desired. Check for salt before serving.


Alternate Methods:

Alternate Method # 1 (Use this if you want to cook the meat ahead of time, my favorite method):

Right before you go to bed: Place the diced onions in the bottom of the crock pot. Lay the frozen turkey thighs on top. Season the meat with the salt and pepper. Pour in about 1 cup of water and put on the lid. Cook on low while you sleep. In the morning, remove the meat and remove the skin and bones and set aside. Mix the rest of the ingredient listed together, tossing the vegetables well to coat. Lay the big chunks of turkey on top. Spoon sauce over the meat. Cover and cook on lowest setting until the vegetables are tender. Add water as desired. Taste for salt before serving.

Alternate Method # 2 (use this method is you are going to be gone all day):

Dump all of the sauce ingredients and into the crock pot, starting with the water, onion soup mix, brown gravy mix, beef base, sherry, Worcestershire sauce, Herbs de Province, bay leaf, onions, and garlic. Stir well. Season the frozen or thawed turkey thighs with the seasoned salt and pepper and nestle into the sauce, spooning sauce over top. Lay all the vegetable chunks on top. Cover and cook on low until meat is tender. Remove the meat and skin and de-bone. Place back into the crock pot and gently stir before serving.


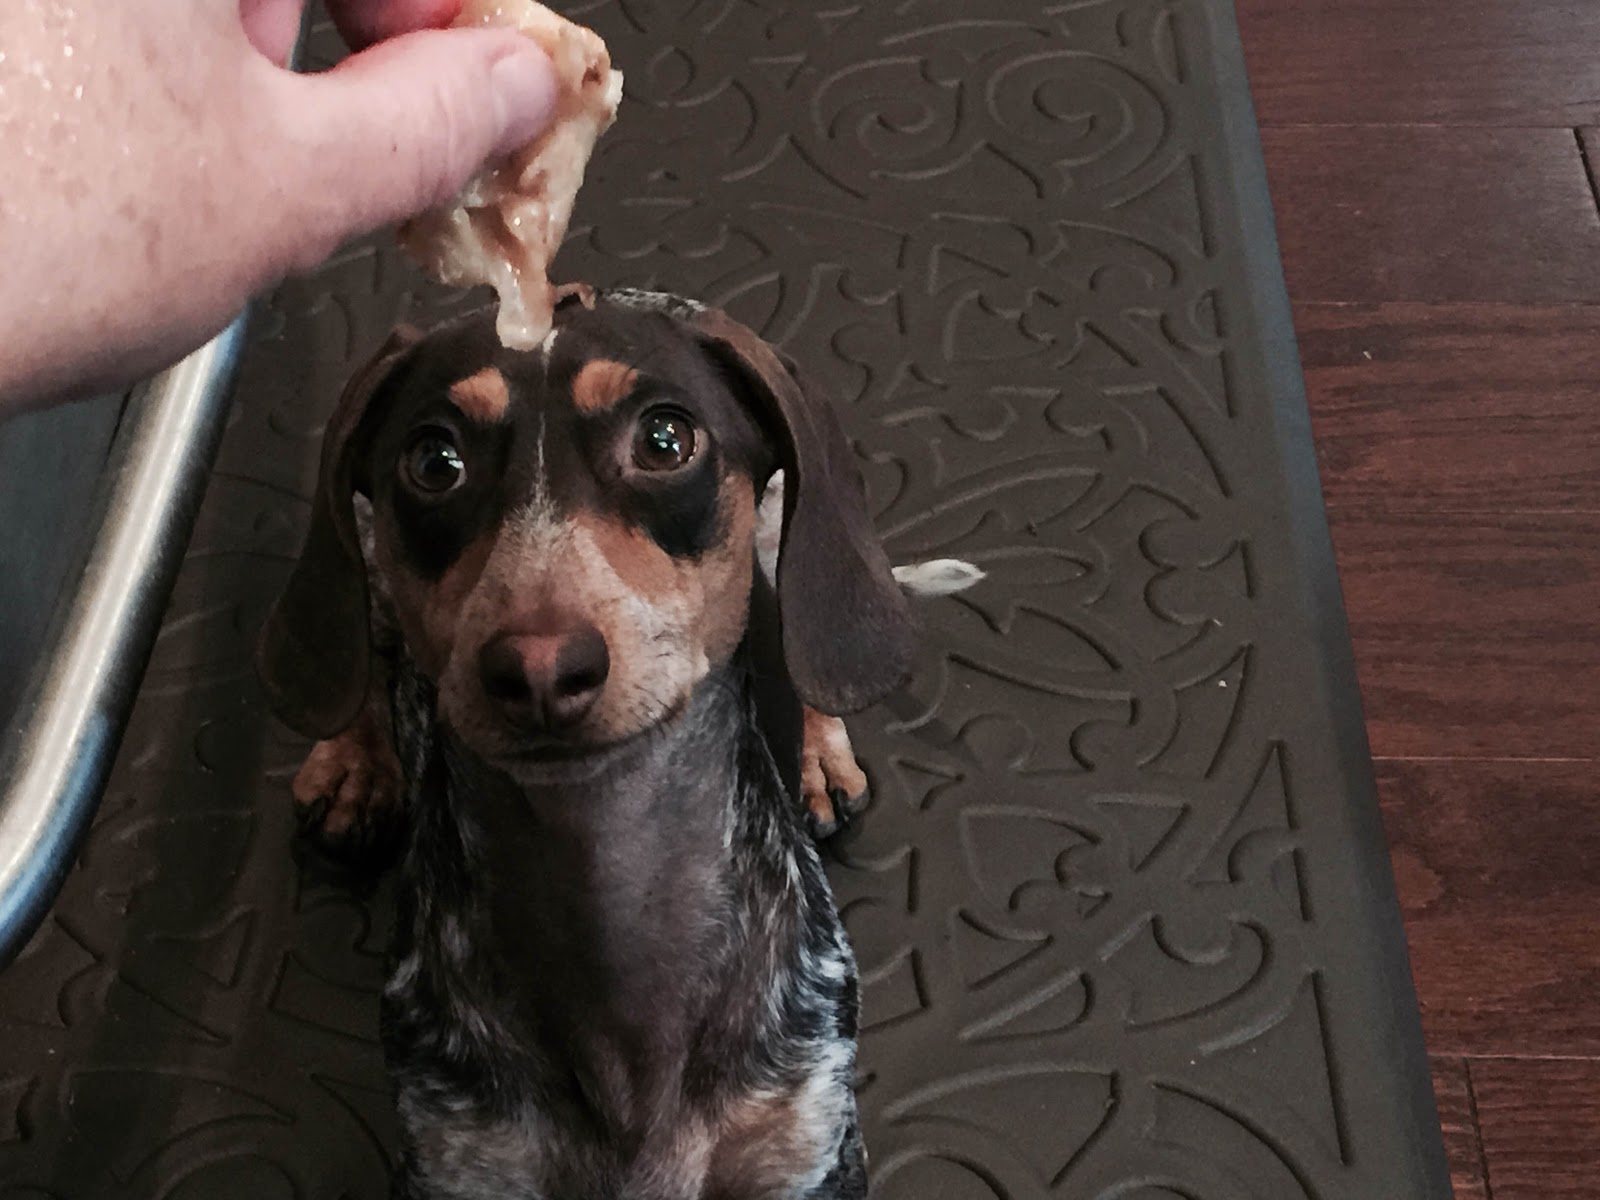
Moki is hoping for a turkey treat! Please mom???
Moki has been such a good patient boy...


Enjoy, 

Leila